If you’ve ever walked into a warehouse in the middle of summer and noticed the air hitting you like a cool, refreshing wave, or stepped into a lab where temperature-sensitive samples stay stable even on the hottest days, you’ve probably benefited from a properly installed chiller unit. As a chiller supplier who’s spent the last 12 years working with small bakery owners, large pharmaceutical teams, construction site managers, and even craft breweries, I can tell you this: a chiller is only as good as its installation. I’ve seen unit after unit fail prematurely because someone skipped a step, cut a corner, or tried to “get it running fast” without following the right process. Today, I’m breaking down exactly how to install a chiller unit the right way—from pre-planning to final checks—so you get years of consistent, efficient performance out of your investment. Chiller Unit
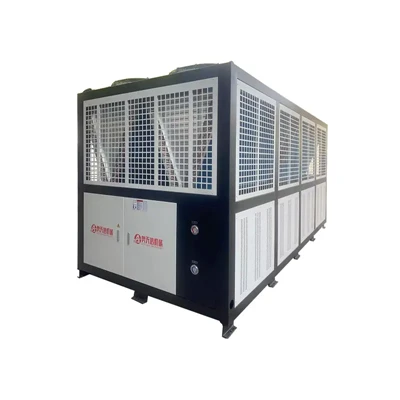
Before we even talk about setting up the unit, there’s a crucial step most people miss: assessing your space and needs. I get calls all the time from customers who bought a chiller because a friend recommended it, only to realize it’s too big for their space, too small to cool their required area, or too loud for their operational hours. Let’s start here: first, calculate your cooling load. This is the total amount of heat you need to remove from your space or process, and it’s not as complicated as it sounds. For commercial spaces, you can use a standard formula that accounts for room size, insulation, number of heat-generating appliances, and ambient temperature in your area. For process chillers (used for things like plastic molding, food processing, or laboratory equipment), you’ll need to add in the heat your process generates. A craft brewery, for example, will need to account for the heat from brewing tanks, wort, and fermentation, while a dental office might need a chiller to keep their X-ray machines and autoclaves cool.
Next, check your space requirements. Chillers aren’t like portable air conditioners you can roll into a corner. They need proper clearance around all sides for airflow—most manufacturers recommend 12 to 18 inches on the condenser side (where hot air is released) and 6 inches on the evaporator side (where cold air or coolant flows). If your chiller is outdoors, it needs to be on a level, sturdy pad—never on grass or uneven concrete, because shifting can damage the refrigerant lines and compressors over time. Indoors, you need to make sure the area is well-ventilated, has easy access for maintenance, and has enough power to handle the unit’s electrical load. Pro tip: if you’re not sure if your space works, send me a photo or the dimensions—I’ve been advising customers on this for years, and I can help you avoid a costly do-over before you even unbox the unit.
Once you’ve confirmed your space and chosen the right chiller unit, it’s time to gather your tools and materials. I always tell customers to buy all necessary parts upfront—nothing kills momentum like waiting for a replacement mid-install. Here’s what you’ll need: refrigerant lines (insulated, sized to match your chiller’s specs), a vacuum pump, a refrigerant gauge set, a torque wrench, electrical wire (rated for your unit’s amperage and environment), conduit, a circuit breaker, pipe sealant (for non-refrigerant lines), adjustable wrenches, a level, a drill, and safety gear: gloves, goggles, and ear protection. If you’re working with water-cooled chillers, you’ll also need a water pump, a cooling tower, and water treatment chemicals to prevent scale buildup. For air-cooled chillers, you’ll just need the condenser and evaporator lines.
Now, let’s talk about getting the unit into place. Whether you’re installing it indoors or outdoors, never move a chiller by lifting it by the pipes or the compressor—those parts are delicate and can crack or become misaligned, leading to leaks or reduced performance. Use a forklift (for large units) or dollies with padding to support the base of the unit. Once it’s on the pad or in the space, use a level to check the top and the base. If it’s not level, shim it with rubber or wood shims—even a small tilt can cause the oil in the compressor to pool, leading to overheating and failure. I once had a customer who skipped this step, and within six months, his chiller compressor seized up because the oil wasn’t circulating correctly. Replacing the compressor cost him twice as much as the shims would have.
With the unit in place and level, it’s time to connect the refrigerant lines. First, cut the lines to the exact length you need—don’t leave extra slack hanging, and don’t stretch them tight (both can cause leaks over time). Use a tubing bender, not a cutter, to make gentle curves—bending tools prevent kinks that restrict coolant flow. Once the lines are cut and shaped, you need to flare the ends correctly: a bad flare is one of the most common causes of refrigerant leaks. A good flare should be smooth, uniform, and free of cracks. If you’re new to flaring, practice on a scrap of copper tubing first—once you get the hang of it, it only takes a few extra minutes, and it saves you hours of troubleshooting later.
After flaring, connect the lines to the condenser (air-cooled) or water-cooling loop, and the evaporator to your space or process. Tighten the fittings with a torque wrench—using a regular wrench can lead to over-tightening and cracking, or under-tightening and leaks. Most chiller manuals will specify the exact torque for each fitting, so follow that closely. Once the lines are connected, it’s time to pull a vacuum on the system. This is a step many people skip to save time, but it’s critical. Air and moisture in the refrigerant lines can cause corrosion, freeze in the lines (leading to blockages), and reduce the chiller’s efficiency. Attach the vacuum pump to the service ports, and run it for at least 30 minutes (for small units) or several hours (for large industrial chillers) until the gauge reads a deep vacuum—usually 500 microns or lower. Once the vacuum is set, close the valve on the gauge, turn off the pump, and wait 15 minutes. If the vacuum holds steady, you’re ready to add refrigerant. If it drops, you have a leak—go back and check all your flare fittings and connections.
Now for the electrical work—this is another step that’s best left to a licensed electrician, if you’re not familiar with working with high-voltage wiring. Chillers run on significant power, and improper wiring can cause electrical fires, damage to the unit, or even injury. First, make sure your electrical panel has a circuit breaker rated for your chiller’s amperage—never use an existing outlet that’s not sized for the unit. Run the wire in a conduit to protect it from damage, and connect it to the unit’s terminal block, following the wiring diagram in the manual. Double-check all connections: loose wires can cause voltage drops that make the chiller run inefficiently, and over time, damage the compressor. Once the wiring is done, test the power at the circuit breaker to make sure it’s supplying the correct voltage before turning on the chiller.
If you’re installing a water-cooled chiller, there’s an extra step: connecting the water loop. Attach the water lines to the condenser, using pipe sealant to prevent leaks, and install a water filter and pressure gauge. Test the water flow to make sure it’s within the manufacturer’s recommended range—too much pressure can damage the chiller, too little can cause overheating. Add water treatment chemicals to prevent scale, algae, and corrosion from building up in the water lines—this is especially important if you’re in a hard-water area, like parts of the Midwest or Southwest.
Now for the final checks before you turn the chiller on. First, double-check all refrigerant line connections—run your hands along the lines (gently) to feel for any signs of cold spots, which could indicate a leak. Check the electrical connections again to make sure nothing is loose. For water-cooled chillers, turn on the water pump and check for leaks at all connections. Once everything looks good, you’re ready to start the unit. Turn on the circuit breaker, then slowly power on the chiller. Let it run for 10 to 15 minutes, and check the pressure gauges on the refrigerant lines. The low-side pressure (between the compressor and evaporator) should be within the range specified in your manual—for most air-cooled chillers, that’s between 50 and 70 PSI, but it varies by unit. Listen to the compressor: it should run smoothly, with no loud rattling or grinding noises. If you hear unusual sounds, turn the unit off immediately and check for issues—don’t let it run with a problem, or you’ll risk permanent damage.
After the chiller runs for the first time, there are a few ongoing steps to keep it working well. Change the air filters every 3 to 6 months, depending on your environment—dirty filters restrict airflow, making the unit work harder and use more energy. Clean the condenser coils once a year, or more often if you’re in a dusty or dirty area—clogged coils reduce the unit’s cooling capacity. Schedule annual maintenance with a professional to check for refrigerant leaks, test the electrical connections, and inspect the compressor and other parts.
I’ve installed hundreds of chillers over the years, and the units that run for 20+ years with minimal issues are the ones that were installed correctly. The units that fail early? They’re the ones where someone skipped the vacuum step, or didn’t level the unit, or tried to do the electrical work themselves and messed up the wiring. Installing a chiller isn’t rocket science, but it does require attention to detail and following the right steps.
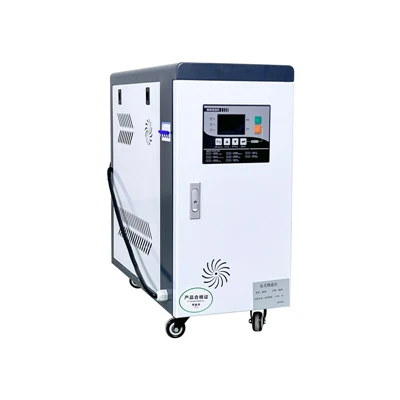
If you’re ready to install a chiller unit, or you have questions about which size or type is right for your space, I’m here to help. Whether you’re a small business owner looking for a chiller for your bakery or a facility manager for a large manufacturing plant, I can provide expert advice tailored to your needs. Don’t risk a bad installation that will cost you time and money down the line—reach out to start a conversation about your chiller requirements today.
Industrial Air Cooler References
- Air-Conditioning Contractors of America (ACCA). Manual N: Commercial Refrigeration System Installation and Service. 2021.
- Refrigeration Service Engineers Society (RSES). HVAC and Refrigeration Installation Handbook. 2022.
- International Mechanical Code (IMC). Chiller Installation Standards. International Code Council, 2021.
- Carrier Corporation. Chiller Unit Installation, Operation, and Maintenance Manual for Air-Cooled and Water-Cooled Models. 2023.
Kunshan Aotianxin Machinery Co., Ltd.
We’re well-known as one of the most reliable chiller unit manufacturers in China. With abundant experience, our factory offer high quality chiller unit made in China with low price. If you have any enquiry about quotation and free sample, please feel free to email us.
Address: 550 Shengguang Road, Bacheng Town, Kunshan City, Jiangsu Province
E-mail: 1516722561@qq.com
WebSite: https://www.atxks.com/
